The ANZAC Ultra 2015 (Canberra, Australia) was the brainchild of Australian ultra identity, race director Phil Essam. It consisted of a 75km part road / part trail loop. Runners completed either 1, 2, 4 or 6 laps over as many days. I was there to take care of feet, so naturally, this article focuses on blisters. Following are eight ultra marathon running tips to keep your feet as free as possible from blister trouble.
Race conditions
This was a vastly different experience compared to Adelaide the year before. Instead of seeing runners every 1.1km, I could only see them every 75km. That meant there were more blisters, worse blisters, less self-care for blisters.
The first two days saw freezing temperatures, record rainfall and snow on nearby mountains. This made for a particularly challenging event for the 6-day runners with issues from foot maceration to hypothermia.
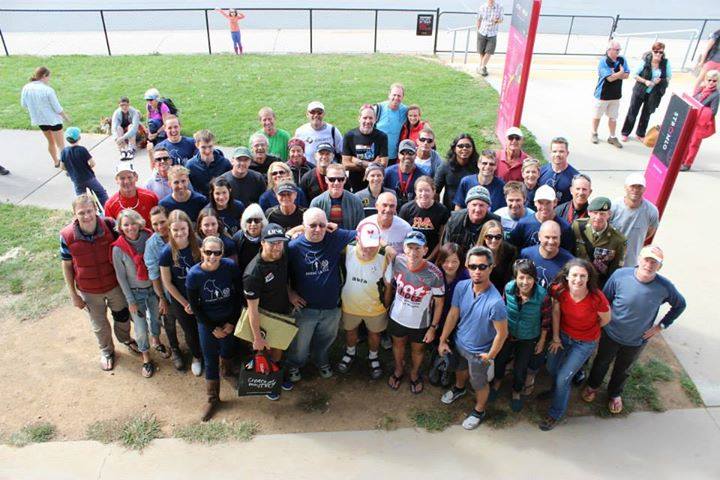
ANZAC Ultra 2015 competitors Canberra
1. There’s always a first time for blisters
First time on my big toe; first time on that foot; the first time ever! This continues to come as a surprise to runners. It shouldn't!
2. Get yourself a blister kit
Get a blister kit together. One that not only gives you the power to treat blisters - but also the power to prevent them! Don’t have the time to source all the items yourself? Get one of our blister kits. Prefer to DIY? No problem - take a look at what’s in these and source the individual items yourself.
3. And don’t be afraid to use it
It’s no good having a blister kit if you don’t know how to use what's in it. Learn how to use each item to its full potential. Take the blister course.
4. Don’t put Compeed on an intact blister – this is what can happen
In this painfully good example, a Compeed was put on an intact blister (that’s a no-no; only use on deroofed blisters). The Compeed peeled back a bit and stuck to the sock like glue. And as the runner took his socks off, it ripped the blister roof right back (I watched this happen, it was not pretty). This would have to be my biggest of all the ultra marathon running tips for treating blisters - make sure you use Compeed the way it was intended to be used.
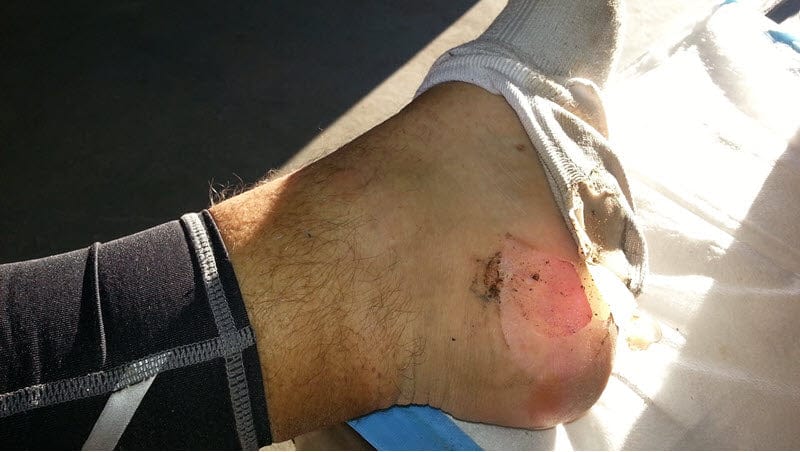
Hydrocolloids should not be put on intact or torn blisters - they are meant for clean, non-infected deroofed blisters
This provided us with a torn blister. But this blister roof was not worth saving - the flappy torn blister roof was glued to Compeed and I couldn’t separate the two! I cut the rest of the roof off and flushed the dirt out with saline (sterile salty water). We were left with a deroofed blister.
Ironically, this now-deroofed blister needs a hydrocolloid dressing on it. A raw weepy blister base like this is exactly the type of wound hydrocolloids are meant for . Learn more about which blister dressing suits which type of blister.
Note: Compeed is a well-known blister product around most of the world. But it is not available in the USA. A comparable product is “Band Aid Advanced Healing Adhesive Bandages”. There are also other brands of hydrocolloid dressings. For example, I’ve used a lot of Comfeel and Duoderm as they are available in larger sizes. These products are usually sold as ulcer dressings and may be available from your pharmacy. We also have our own BlisterPod brand of hydrocolloid dressings.
5. Beware of heel edge blisters
My ultra marathon running tips number 5 is to understand edge blisters. They are very common in ultra running. Edge blisters at the heel were common among ultra runners at this event. This is what they look like.
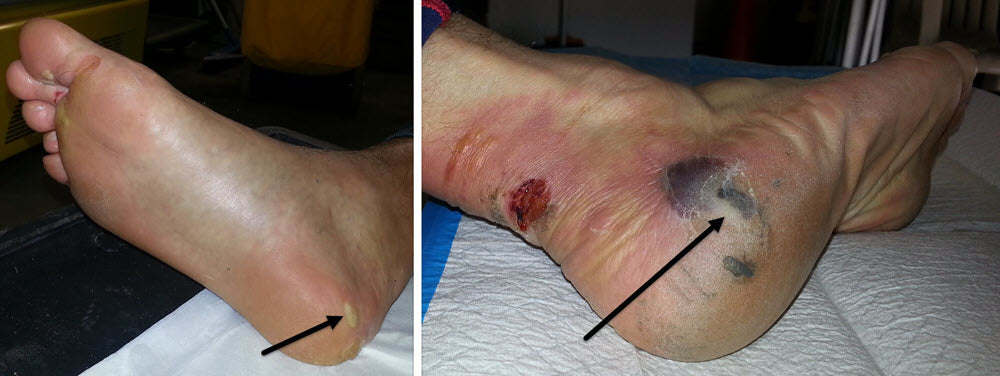
Edge blisters on the side of the heels were common
The irritation comes from the insole where it curves up and meets the side of the shoe. When there’s a lot of blister fluid, it gets squeezed upwards so it looks like the side of the heel is the problem area. The best way to prevent and treat these blisters is with Engo patches to reduce friction levels. These work even better than donut pads (donut pads are always uncomfortable on this part of the foot). Learn about edge blisters and how to apply Engo patches with this video. Below that is an Engo 4-Pack which contains 4 large oval patches. Using a special application technique for these edge blisters called the Two Patch Technique, the 4-Pack will cover you for 2 edge blisters (that’s one pair of shoes if you have one edge blister on each foot).
6. And keep your focus on prevention
Blisters are not inevitable in ultrarunning. They’re common, but they’re not inevitable.
If you really think you’ve tried everything, let me help you! I’m serious!
7. One thing leads to another
I can give you two examples of this that I saw at this race.
- A seemingly insignificant roll of the ankle, even if it doesn’t hurt much at the time, can cause you to change your running technique. Sometimes without you even realising. Rolling your ankle (inversion ankle sprain) can tweak the lateral ankle ligaments. This makes the peroneal muscles work harder to limit the motion that aggravates the injured ligaments. And things can go downhill from there.
- Blisters can form in the days after the race. There were two runners that finished the event a day early but stayed at the venue. Both saw me the following day for post-race blister care. And both had formed new blisters at the styloid process (the bony lump half way along the outside of the foot) - an odd spot for a running blister. Neither blister was there at the end of their race 24 hours before. So this was unexpected. Although neither runner had spent much time on their feet in that 24 hours, there was a lot of side to side sway when they were walking - due to their aches, pains and stiffness (the post-ultra waddle). I assume this very stiff and guarded gait was the cause of these blisters.
8. Watch out for infected blisters
Pus indicates infection. Compared to normal blister fluid which is thin and clear, pus is yellow. This one was on the tip of the second toe under a callus. The runner didn’t feel it as being sore (mind you, everything’s sore after you’ve run 450kms in 6 days). I discovered it while treating a different blister that was bothering him. The toe was not red, there was no cellulitis or lymphangitis. To the untrained eye, it looked like a callus with a small blister underneath it. But to someone who deals with feet a lot, the look and feel of the callus indicated there was underlying infection.
Do you know what the signs of infection are and what to do?
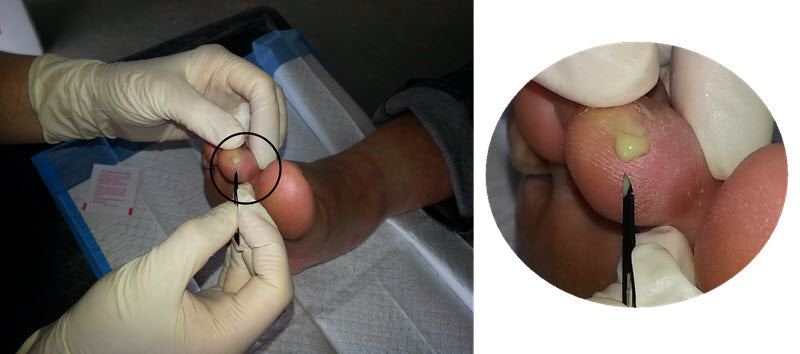
Infected blister on the tip of the toe
Conclusion
It was an absolute pleasure to be involved in this race. And a big thank you to the runners who let me take photos (and videos) of their feet! If you'd like to know more ultra marathon running tips for blisters, this is a good place to start.

